Notes on illustrations in the Druid Temple booklets
An Appeal to the Nation (1937) has two foldouts, one at the front and one at the back.
The front foldout is printed on both sides, giving three illustrations in all.
This booklet has no other illustrations.
In The Druid Temple Explained (1939) Mann used the same three illustrations as in the Appeal,
but now on a single foldout, so that two of them had to be reduced.

|
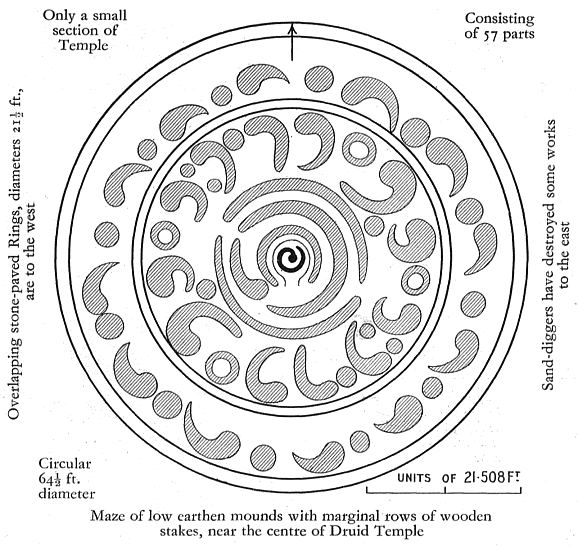
Plan of innermost part of the circular area
An Appeal to the Nation: Front foldout, recto
The Druid Temple Explained: Back foldout, verso, left half (reduced)
Signed “LMM” |

|
Cup-and-ring carvings on a rock north of Knappers, Clydebank
An Appeal to the Nation: Front foldout, verso
The Druid Temple Explained: Back foldout, recto
Signed “G.A. [George Applebey?] W.H. L.M.M. Nov ’37” |

|
Typical wicker figures, their sizes expressing planetary harmony
An Appeal to the Nation: Back foldout, recto
The Druid Temple Explained: Back foldout, verso, right half (reduced)
Signed “LMM” |
Besides the foldout, The Druid Temple Explained has four pages of plates in the middle of the booklet,
plus a small illustration inside the front cover and a route map on the back cover.
On the plan of the “maze”,
the note “64½ ft. diameter”
should read “64½ ft. radius”, as is clear from the scale and from other statements
in the booklet.


