This document decribes how to set up a Winlink Client using LinBPQ. Familiarity with the Winlink 2000 system is assumed, along with (very) basic Linux knowledge. Although slanted towards Linux, as the Winlink team do not provide Linux equivalents of their software, the same features are available on Windows BPQ32.
BPQ32/LinBPQ is a pretty complex package, with many options. This document describes how to set up a Winlink Client with support for Winlink templates and forms using the Webmail interface to the LinBPQ BBS, with Telnet access to the CMS servers, without having to wade through a lot of irrelevant stuff. Once you have a basic system running if you want to add other options it shouldn't seem so
complicated. If you want more information, the full specification of
bpq32.cfg is here
.
If you are using a Raspberry Pi and are completely new to the PI, there are intructions on
how to do the basic setup of the Pi Linux operating system here. Stop when you get to the "Installing LinBPQ section and continue here.
I've written a simple script to download and and install the linbpq software and configuration files. The script
can be seen here.
and the bpq32.cfg it installs here
Download the script using wget, set it as executable and run it:
wget http://www.cantab.net/users/john.wiseman/Downloads/installWebMail
chmod +x installWebMail
./installWebMail
This will create the directory linbpq and download linbpq and other needed files into it. It will prompt for your callsign and edit the configuration files with your call.
The LinBPQ Node configuration is held in file bpq32.cfg. The installed file sets up the Web Management interface and an RMS client to access the Winlink CMS Servers. The system will work as installed, but I suggest you to change the user and password in the USER= line in the Telnet Server section from the default "user" and "password" to make your system more secure. You can also set LOCATOR to your Grid Square, if you would like your station to appear on the BPQ32 Node Map.
The installation enables access to the Winlink CMS Servers as a Winlink Client. If you want your station to be able to operated as a Winlink Gateway for other stations you will need to add CMSCALL= and CMSPASS= lines to the Telnet Server configuration (below the line CMS=1).
The remaining configuration can be done using the Web interface. Start linbpq:
cd linbpq
./linbpq
You should see something like
pi@pi6 ~/linbpq $ ./linbpq
G8BPQ AX25 Packet Switch System Version 6.0.17.2 November 2018
Copyright © 2001-2018 John Wiseman G8BPQ
Current Directory is /home/pi/webmail/linbpq

Configuration file Preprocessor.
Using Configuration file /home/pi/webmail/linbpq/bpq32.cfg
Conversion (probably) successful

PORTS 1e67a8 LINKS 1e7544 DESTS 1ea444 ROUTES 1f09d4 L4 1f23d4 BUFFERS 1f87f0

Initialising Port 01     Telnet Server
Starting Mail
Config File is /home/pi/webmail/linbpq/linmail.cfg
Config Processed
Mail Started
Note that LinBPQ is intended to run in the background, (see later for how to set this up) so you can't interact with it, except to shut it down with ctrl/c.
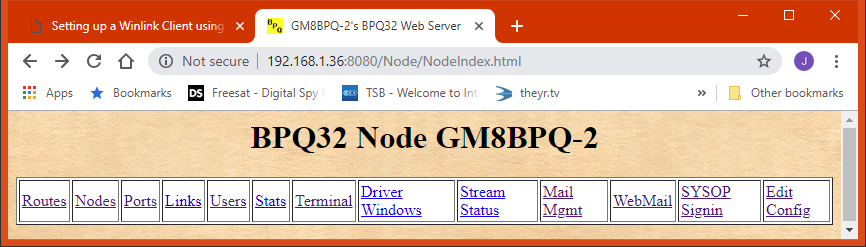
Open a Web browser, either on the LinBPQ machine or another on the same network and connect to 127.0.0.1:8080 if using a local browser or ipaddr:8080 if using a remote machine. You should see the node management page:
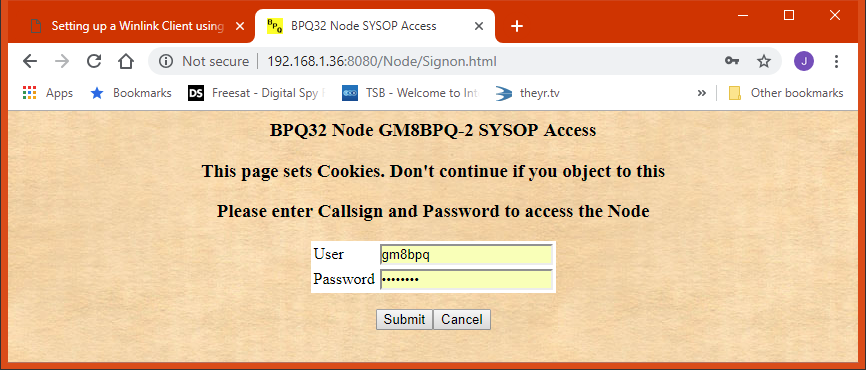
If you are connecting to 127.0.0.1 you will be logged into the management interface automatically. If not, you need to sign in using the SYSOP Sign in link. If you haven't edited the USER line the user and password are "user" and "password"
Select the "Mail Mgmt" link and you should see the Mail Server configuration menu:
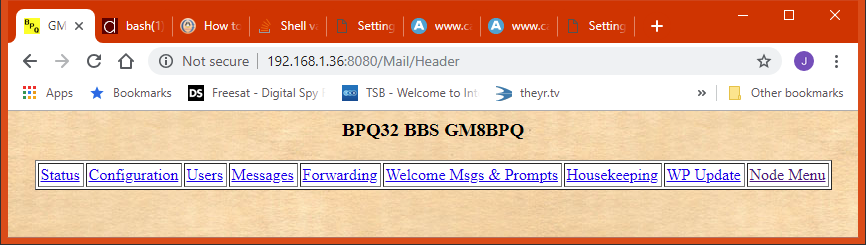
You need to set up a password for your user on the BBS, and if you want to use the telnet link to a CMS your Winlink Password. Click Users:
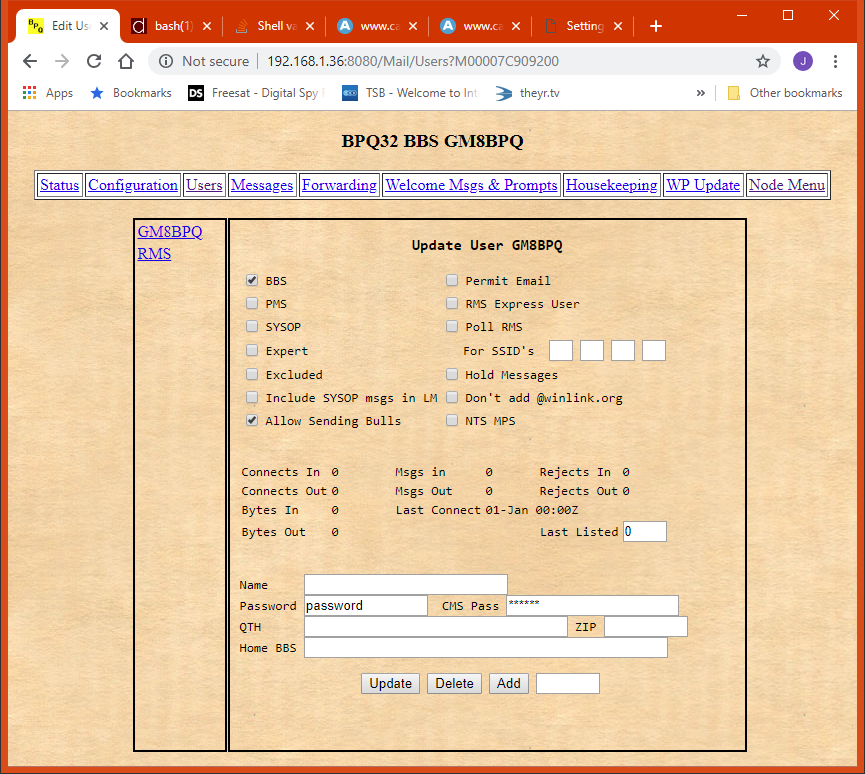
Select your callsign, then fill in the Password field and CMS Pass to access Winlink and check SYSOP, then click "Update" You don't need any other settings, but if you are interested see the Mail Configuration documentation.
You should now be able to access the WebMail interface. Click "Node Menu" then "WebMail". If you are connecting to 127.0.0.1 you will be logged into Webmail automatically, if not you will see the WebMail signin screen. Enter your callsign and the password you entered above. You should see the WebMail main page, from which you can read and compose messages.
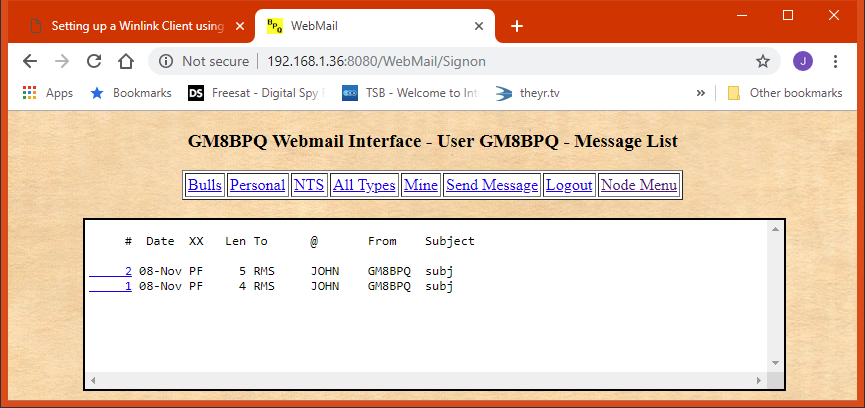
Instructions for using Webmail are here
Unless you only want to send messages to Winlink via the Internet you will be using a radio interface. LinBPQ supports a wide range of radio interfaces, including hardware TNCs for Packet or Pactor and software TNC for modes such as ARDOP.
Forwarding is the process of sending your messages to where they need to go. This may be the Winlink CMS Servers, other BBS systems, or Internet email. As this tutorial is primarily about setting up a Winlink Client only connecting to CMS Servers is covered here. See the full BPQ32/LinBPQ documentation for other options.
As installed using the above script the system will send any mail addressed to a winlink user or an Internet Email address to a CMS using Telnet. This is done by queueing the message to BBS "RMS". To set the system to forward over radio you need to edit the forwarding script for BBS RMS.
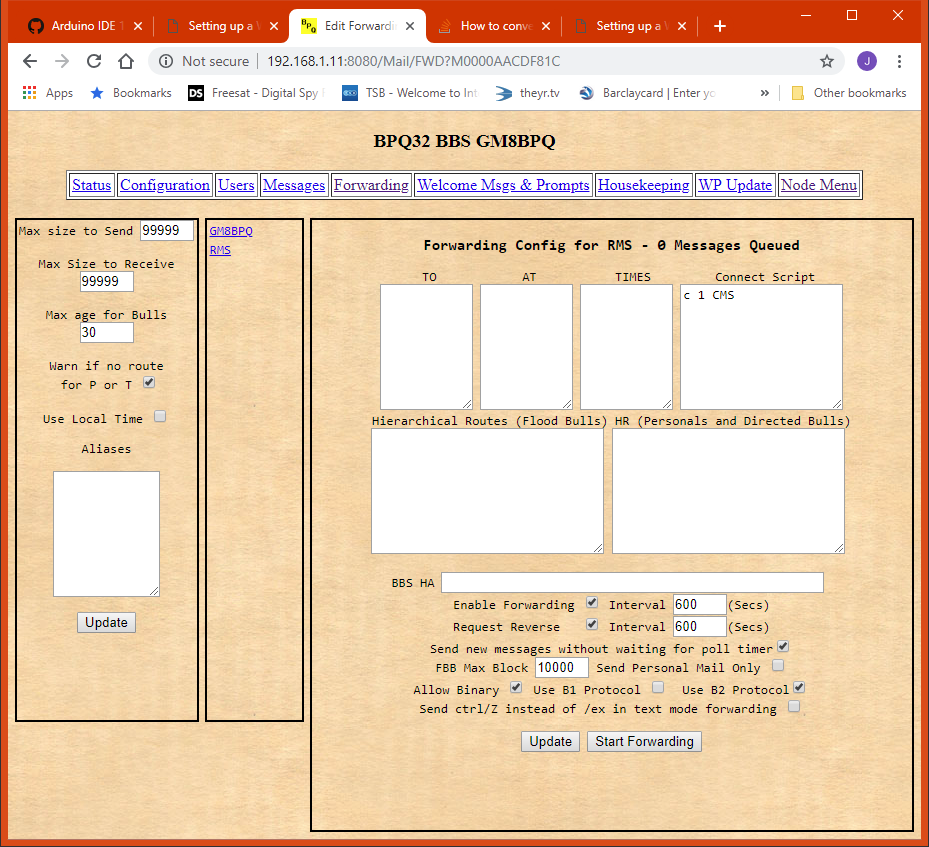
The existing entry "C 1 CMS" tells the BBS to connect to a CMS using port 1 (Your Telnet Port). You change this to connect using your radio port. If you are using packet, to connect via gateway RMSCALL replace with C 2 RMSCALL. To connect using ARDOP and similar HF protocols you need to allocate the port first, then connect, so the script would be
att 2
c RMSCALL